Planning a getaway but worried about your balcony garden surviving without daily care? Self-watering systems offer a practical solution for maintaining plants during extended absences. This guide presents five proven DIY methods-including bottle drip systems, wick irrigation, and clay olla setups-along with testing strategies to ensure your plants remain healthy while you’re away.
Introduction: Why Self-Watering Matters for Balcony Gardens
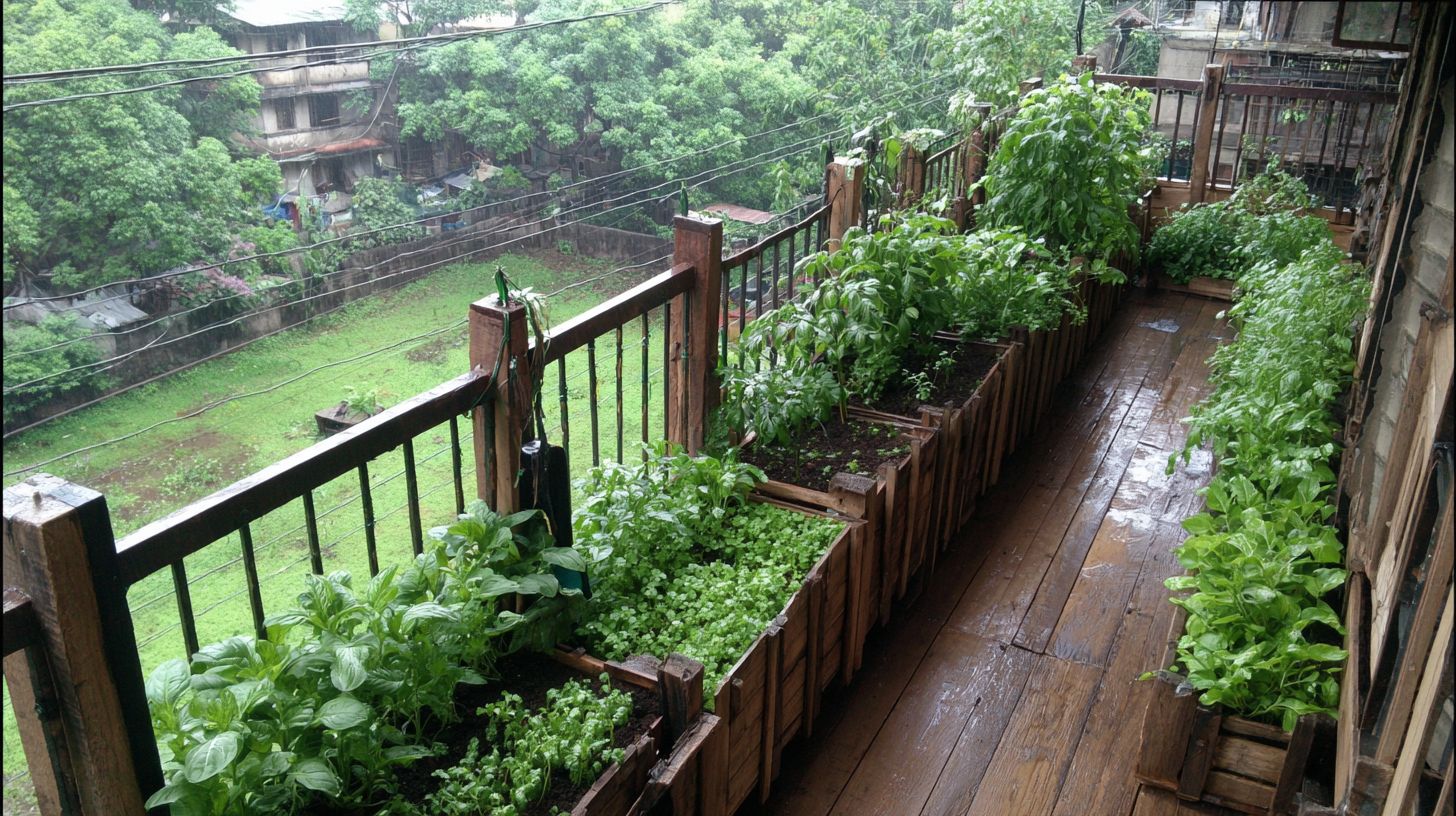
Balcony gardeners lose 40% of container plants during 7+ day absences due to rapid soil drying in terracotta pots and shallow containers. This problem affects herbs, tomatoes, and leafy greens most often. These plants rely on consistent moisture levels that become hard to maintain during travel.
Urban heat island studies show balcony temperatures often run 5-8 degrees above street level. This extra warmth speeds up evaporation from exposed soil surfaces. Plants in small containers feel the stress quickly when left unattended.
Coco coir holds 30% more water than standard potting mix alone. This material helps retain moisture around roots during extended absences. Many apartment gardeners now blend it into their containers for better results.
Targeted root zone delivery reduces water waste compared to overhead methods. Less moisture escapes through evaporation when water reaches the roots directly. This approach supports healthier plants while using fewer resources overall during vacation periods.
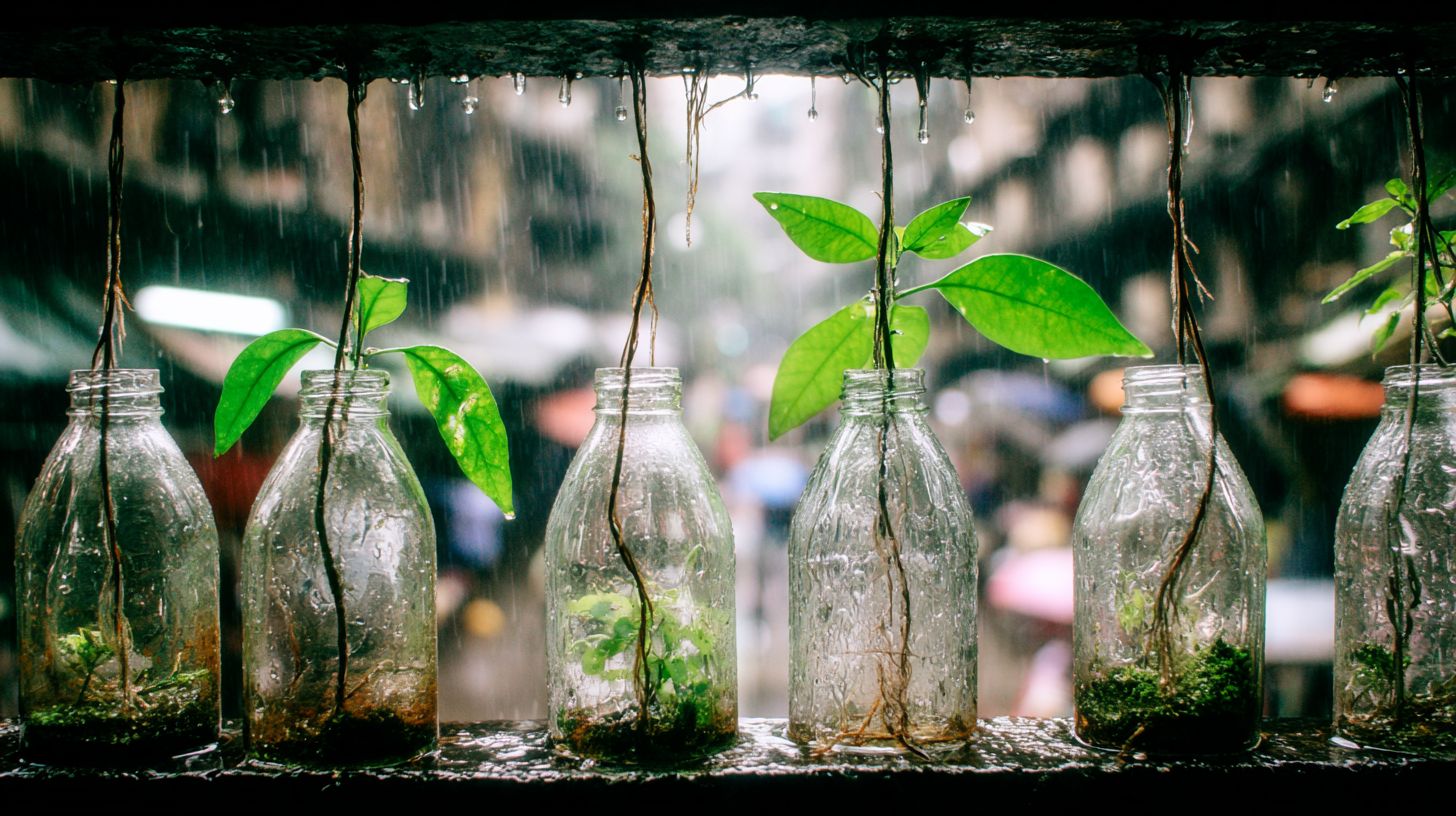
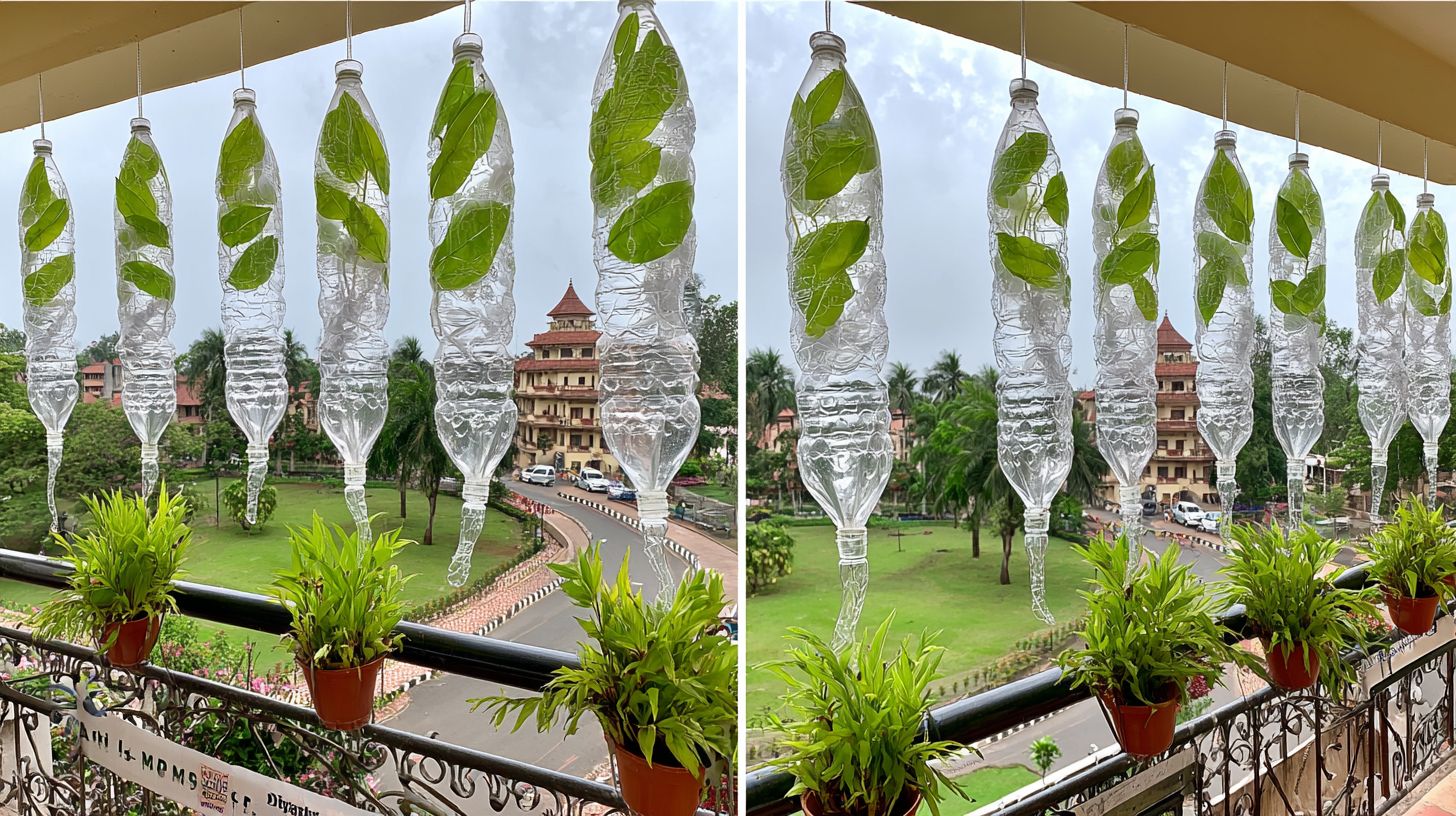
Hack 1: Plastic Bottle Drip System
Plastic bottle drip systems use repurposed containers to create controlled, low-cost moisture delivery for balcony container gardens. These setups work well for apartment dwellers who need reliable plant hydration during time away. Recycled bottles offer an accessible solution for maintaining soil moisture without daily attention.
Plastic bottle drip systems deliver 200-300ml daily to each plant using gravity-fed flow through a 2mm hole in the cap. The design allows consistent water release over several days. Container plants benefit from this steady supply that reaches the root zone gradually.
Balcony gardeners appreciate how this method reduces the risk of both underwatering and overwatering. The system fits easily into small spaces where traditional irrigation setups would be impractical. Many urban plant owners rely on this approach for weekend getaways and longer trips.
Gravity fed delivery keeps the soil evenly moist without creating soggy conditions. This technique supports various plant types including herbs and leafy greens commonly grown in tiny gardens. The approach aligns with sustainable practices by repurposing household items.
Materials Needed
Gather one 1-liter or 2-liter clear plastic bottle, 3-inch nail or 2mm drill bit, lightweight potting mix blend with 20% perlite, and optional coffee filter to prevent clogging. Clear bottles allow easy monitoring of water levels throughout the vacation period. Size selection depends on container dimensions and expected absence duration.
Use one bottle per 10-inch pot with 5-7 drainage holes in the bottle cap. A 1L bottle suits 6-8 inch pots while 2L bottles work better for 10-12 inch containers. This ratio ensures adequate water reserves without overwhelming smaller root systems.
The setup costs nothing when using household bottles compared to $12 for commercial drip stakes. Lightweight soil with perlite improves drainage and prevents water from pooling around roots. A coffee filter placed inside the cap stops soil particles from blocking the holes.
Many balcony plants respond well to this measured water delivery system. The materials remain accessible and require no special tools beyond basic household items. This budget approach supports eco friendly gardening practices.
Step-by-Step Setup
Step 1: Drill or puncture 5-7 small holes in the bottle cap using a heated nail. These openings control the flow rate at approximately 50ml per hour through 2mm holes. Proper hole size prevents rapid drainage while maintaining steady moisture.
Step 2: Cut the bottle bottom off to create a funnel opening. This allows easy refilling and reduces evaporation from the water surface. The inverted design creates a simple reservoir that releases water as soil dries.
Step 3: Bury the capped end 3-4 inches into soil near plant stem. Position the bottle so water reaches the active root zone effectively. Secure placement prevents tipping in windy balcony conditions.
Step 4: Fill bottle with water and cover opening with plastic to reduce evaporation. Run the system for 2 hours before vacation to verify delivery amount. Tape over holes to reduce flow for succulents that prefer drier conditions between waterings.
Hack 2: Cotton Wick Irrigation
Cotton wick irrigation uses natural fiber ropes to draw water upward through capillary action from a separate reservoir into container soil. This method creates a reliable delivery system that keeps balcony plants hydrated during your absence.
Cotton wick systems move water daily via capillary action from a lower reservoir to plant roots using quarter inch cotton rope. The setup works well for tiny gardens where space remains limited and frequent watering becomes difficult.
Container gardening benefits from this approach because it reduces daily maintenance tasks. Urban gardeners find this solution particularly useful for apartment plants that need consistent hydration without constant attention.
The system relies on simple physics to maintain soil moisture levels. Plant roots receive steady water supply through the wick while excess moisture stays controlled through proper reservoir placement.
Materials Needed
Source one hundred percent cotton rope or jute twine, two sixteen to twenty ounce plastic bottles or food containers for reservoir, scissors, and optional capillary mat cut to fit pot bottom. Avoid synthetic rope because it fails to absorb water properly.
Each pot requires eighteen to twenty four inch rope length with three eighths inch diameter minimum for adequate water flow. Smaller diameters restrict movement and larger sizes waste materials unnecessarily.
A one liter reservoir holds enough supply for four to five days depending on plant size and weather conditions. Cut up cotton t shirts work as wicks in emergencies when proper rope is unavailable.
Recycled bottles serve as effective reservoirs and reduce waste at the same time. Select containers with secure lids to minimize evaporation and prevent debris from entering the water supply.
Step-by-Step Setup
Thread one end of cotton rope through drainage hole until four inches remain above soil. This positioning allows enough length for proper placement near the root zone without excess material.
Bury rope end three inches into soil near root zone. The placement ensures water reaches active growing areas where plants need hydration most during your vacation period.
Place other rope end into water reservoir positioned below pot level. Reservoir must sit six to eight inches beneath pot base for proper capillary pull to function effectively.
Soak rope thirty minutes before installation to start the absorption process. Fill reservoir and cover opening to minimize evaporation and algae growth during extended absences.
Replace rope if water stops traveling after three days of use. Check connections and saturation levels regularly to maintain consistent delivery to your balcony garden plants.
Hack 3: Clay Pot Olla Method
Unglazed terracotta olla pots buried in container soil release 400-600ml daily through porous clay walls via moisture gradient to surrounding root zone. This creates an automatic watering system that responds directly to plant needs. The process draws from traditional irrigation practices adapted for balcony gardens.
The olla mechanism works through unglazed clay that allows water to seep slowly based on soil dryness. When surrounding soil dries out, moisture moves through the terracotta walls toward plant roots. This prevents both overwatering and underwatering during vacation periods. Container gardening benefits from this consistent hydration approach.
Size selection matters for effective results. Choose 4-6 inch diameter olla pots for 10-12 inch containers, while 8-inch versions suit larger planters. Proper fit ensures the reservoir stays buried correctly without crowding roots. Garden centers carry these pots for $8-15, or small terracotta wine coolers work as budget alternatives.
Check water level every 5-7 days to maintain steady supply. This refill interval keeps plants hydrated during short trips or longer vacations. Urban gardening becomes simpler with this low maintenance solution that requires minimal attention before departure.
Hack 4: Sponge Reservoir Tray
Sponge reservoir trays placed beneath 4-6 pots supply 100ml per pot daily through felt capillary mats cut from old yoga mats or towels. This setup creates a reliable water source for balcony gardens during vacation periods. The moist material stays in contact with drainage holes and feeds roots steadily without flooding the soil.
Construction begins by lining a shallow tray with one inch thick sponge or multiple layers of felt fabric. Fill the tray with two inches of water so the material stays saturated. Position pots directly on top so the drainage holes touch the moist surface and allow capillary action to move moisture upward.
One 12 by 24 inch tray supports six standard herb pots when arranged in a single row. The compact size fits most balcony railings and window ledges without taking extra space. Apartment gardeners find this solution useful for tomatoes, leafy greens, and herbs that need consistent moisture while away.
Refill the tray every three days during summer conditions to maintain steady hydration. Check the water level before leaving and top it up so the sponge remains damp throughout the trip. This method works well as a plant sitter alternative for short vacations and weekend getaways.
Hack 5: Timed Drip from a Bucket
A 5-gallon bucket with battery-operated drip timer delivers 50ml per emitter every 12 hours to 8-12 balcony containers using 1/4-inch tubing and adjustable drippers. This system keeps your balcony garden hydrated while you travel without daily checks.
The setup relies on gravity and a programmable timer to release water at set intervals. Your plants receive consistent moisture through drip irrigation lines that reach each container directly. This approach works well for apartment plants that need steady hydration during longer absences.
You will need an Orbit single-outlet timer, a 5-gallon bucket with lid, 50 feet of 1/4-inch tubing, and 10 adjustable drippers. These components fit easily on small balconies and store compactly when not in use.
Setup time takes about 45 minutes for 8 pots. Start by drilling a hole near the bucket base for the tubing. Attach the timer to the bucket outlet, then run lines to each container and install drippers at the soil surface.
The timer runs on 2 AA batteries that typically last 6 months. This power source removes any need for electrical outlets on your balcony. Position the bucket higher than your plants so gravity assists water flow through the system.
Test each dripper for 2 minutes before your trip. Adjust the flow until you achieve consistent 50ml output per emitter. This calibration prevents both underwatering and overwatering while you are away.
Fill the bucket with clean water and secure the lid to reduce evaporation. Place the container on a stable surface near your plants. The entire setup stays hidden behind foliage while delivering automatic watering to your tiny garden.
Pre-Vacation Testing Tips
Run each watering system for 72 hours while home to measure actual water delivery and identify leaks before departure. This trial period reveals how your chosen setup performs under real balcony conditions. Adjust components now rather than discovering issues after you leave.
Day 1 focuses on installation and flow rate observation. Fill the reservoir completely and note how quickly water moves through your wick, bottle, or drip lines. Watch for drips at connections and ensure water reaches the soil surface without pooling on leaves.
Day 2 involves checking soil moisture at 2-inch and 4-inch depths using your finger or a simple wooden skewer. Push the probe into multiple spots around each container. Record whether the middle zone feels damp while the surface stays slightly dry, which prevents both underwatering and overwatering.
Day 3 confirms reservoir depletion matches expected usage for your plant types and container sizes. Empty reservoirs show true consumption rates. Refill and compare levels at the same time each day to establish a reliable pattern before vacation begins.
Soil still dry after 24 hours signals a need to increase hole size or wick diameter. Wider openings or thicker cotton rope improves capillary action and delivers more moisture to plant roots. Test the adjustment for another full day to confirm improvement.
Watch for leaf droop or yellowing as clear failure indicators during testing. These signs mean your system delivers too little water or the soil dries faster than expected. Make small changes immediately and retest until plants appear healthy and hydrated.
Final Checklist Before You Leave
Complete 8-point pre-departure verification covering water levels, system positioning, shade adjustments, and emergency contact instructions. This final step ensures your self-watering setup performs reliably while you are away. Each item addresses a specific factor that affects plant hydration during your absence.
Start by filling all reservoirs to maximum capacity. Check every container to confirm the water level reaches the full mark. This step provides the longest possible supply for your balcony garden during vacation.
Next, test each dripper or wick for active flow. Run a quick check on every cotton rope and plastic bottle setup to verify water moves steadily through the system. Consistent movement prevents dry soil and keeps roots hydrated.
Move containers out of direct afternoon sun if possible. Shift pots into partial shade or group them together to create microclimate humidity. This simple adjustment reduces evaporation and helps maintain steady moisture around each plant.
Remove dead leaves to reduce transpiration stress on your remaining foliage. Clean foliage allows the automatic watering system to focus on healthy growth rather than supporting stressed tissue. This small step supports overall plant health during travel.
Set out plant sitter instructions with photos for anyone checking your apartment plants. Include clear notes on water reservoir locations and wick placement. Visual guides help others follow your DIY setup without confusion.
Close blinds to reduce heat buildup on the balcony. Lower temperatures slow water loss and protect your tiny garden from excessive drying. This action works well alongside your gravity fed systems.
Note departure and return dates on your calendar reminder. Post a neighbor phone number near the self-watering systems as backup contact. This final detail ensures someone can respond quickly if any issue arises while you are gone.